9 Easy Steps to Easily Manage Soil Sampling with FarmQA
Soil sampling is a crucial task for any agronomist looking to optimize their customer's crop yields and make informed decisions about fertilization and nutrient management. With FarmQA, this essential process becomes more accessible and efficient. Here are nine easy steps to help you effortlessly manage soil sampling with FarmQA.
1. Get Your Fields into FarmQA
Fields in FarmQA can easily be drawn in from either the web or mobile app. Go to the Map tab and click the Create fields button. You’ll then be able to use our drawing tools to draw in your field boundaries and add in any associated field information.
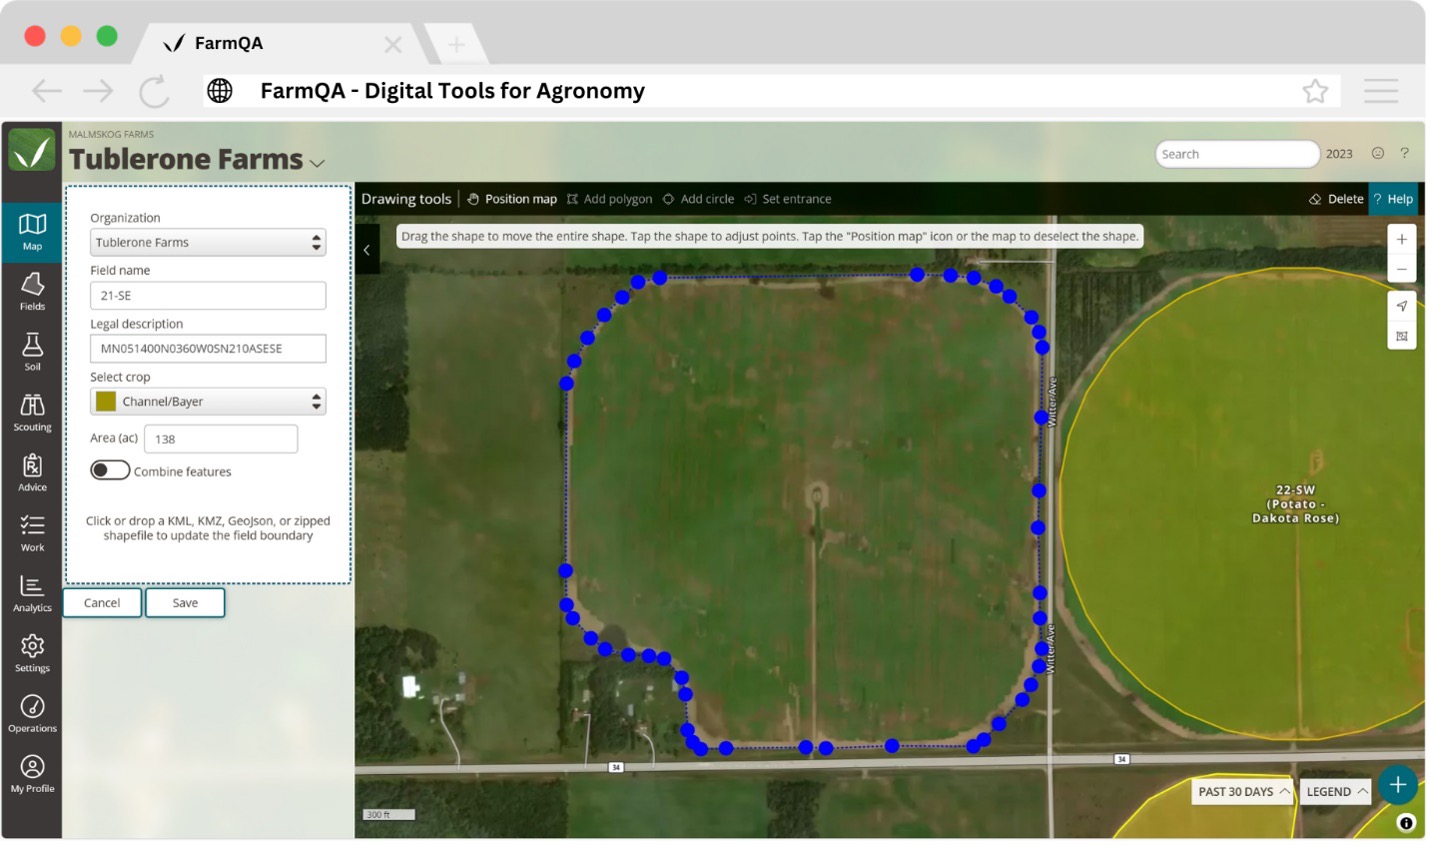
If you have your field boundaries loaded into a different account, download those and send them over to the FarmQA Support team and we’ll upload them on your behalf. Field boundaries uploaded in this way can include the Grower > Farm > Field organization structure that you want to implement in your account.
Article: Creating fields in FarmQA
Article: Creating fields in the FarmQA mobile app
2. Setup Tasks in your FarmQA
FarmQA's system is designed with efficiency in mind. One standout feature is the ability to track progress through grower fields using a color-coded system based on work item status. This feature provides an intuitive, at-a-glance view of which areas have been sampled, processed, and are awaiting action. It streamlines the sampling process, reduces errors, and ensures that no portion of an organization is overlooked.
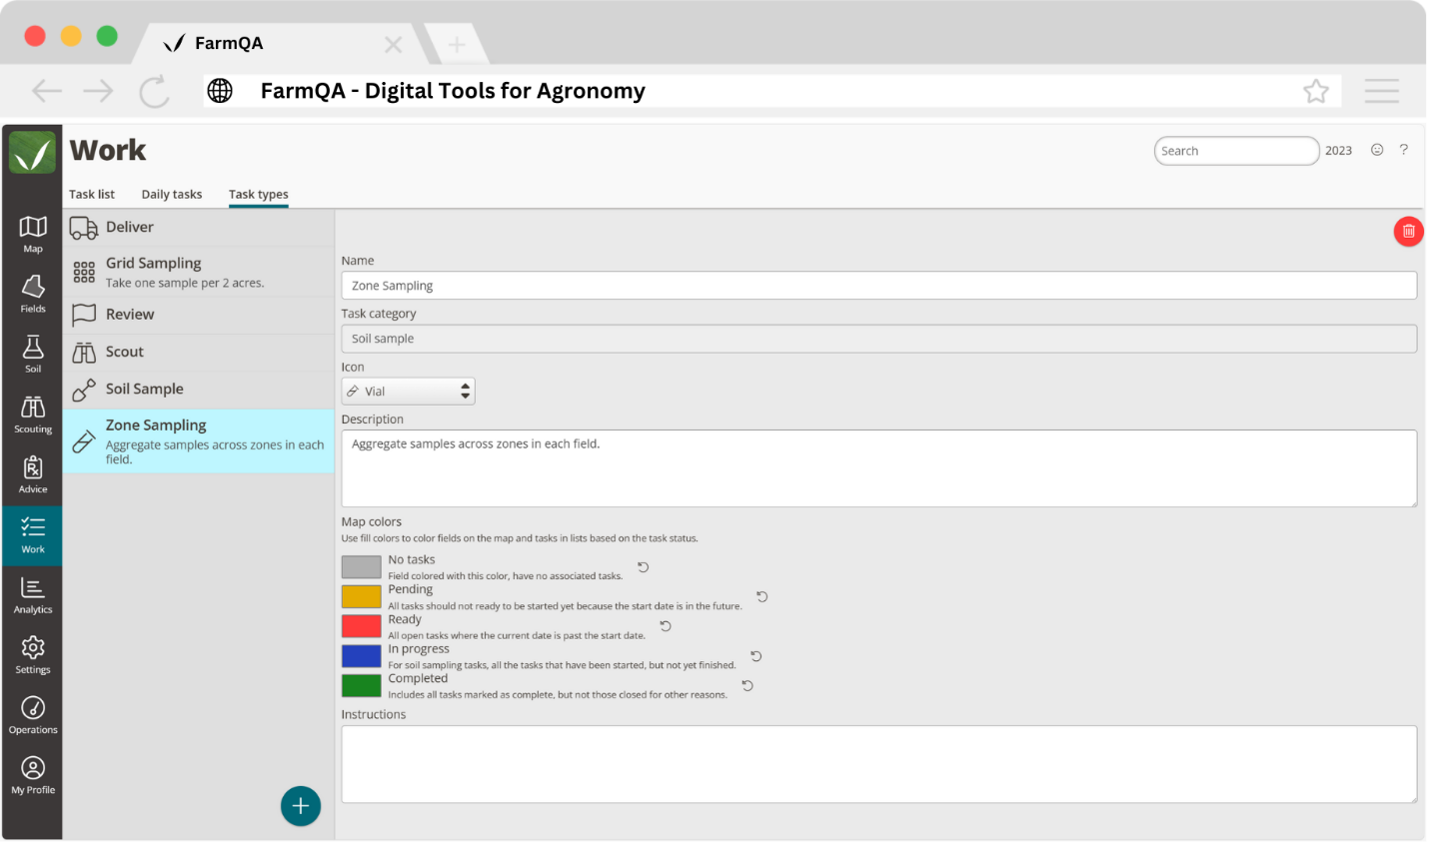
FarmQA’s Task functionality lets you associate tasks to your fields to help you and your team keep track of the fields you need to sample this fall.
We provide generic task types such as Scout and Soil Sample, but you’ll also want to create some custom task types to better represent the type of sampling you’ll be performing, like having Grid Sampling and Zone Sampling tasks you can associate with your fields. Go to the Work page then the Task types tab and click the Add button to create your custom tasks.
Article: Overview of work and task functionality in FarmQA
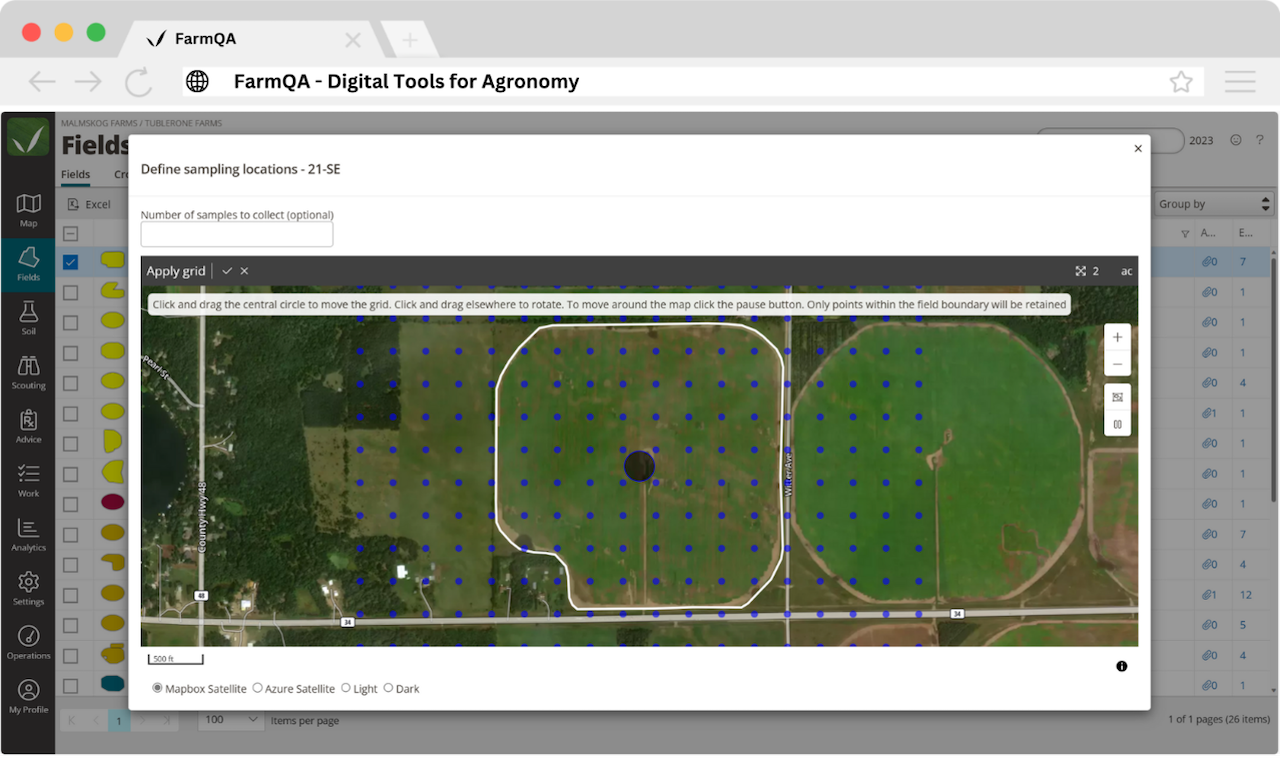
3. Create a Zone or Grid Sampling Plan for Your Field
Have your sampling plan ready to go when you get out to the field. Soil sample locations can be setup with FarmQA Tasks when you’re creating the soil sampling tasks for your fields. Drop individual pins into each of the zones in your field or setup a grid sampling plan with the push of a button.
Article: Creating a grid-based soil sampling plan for a field
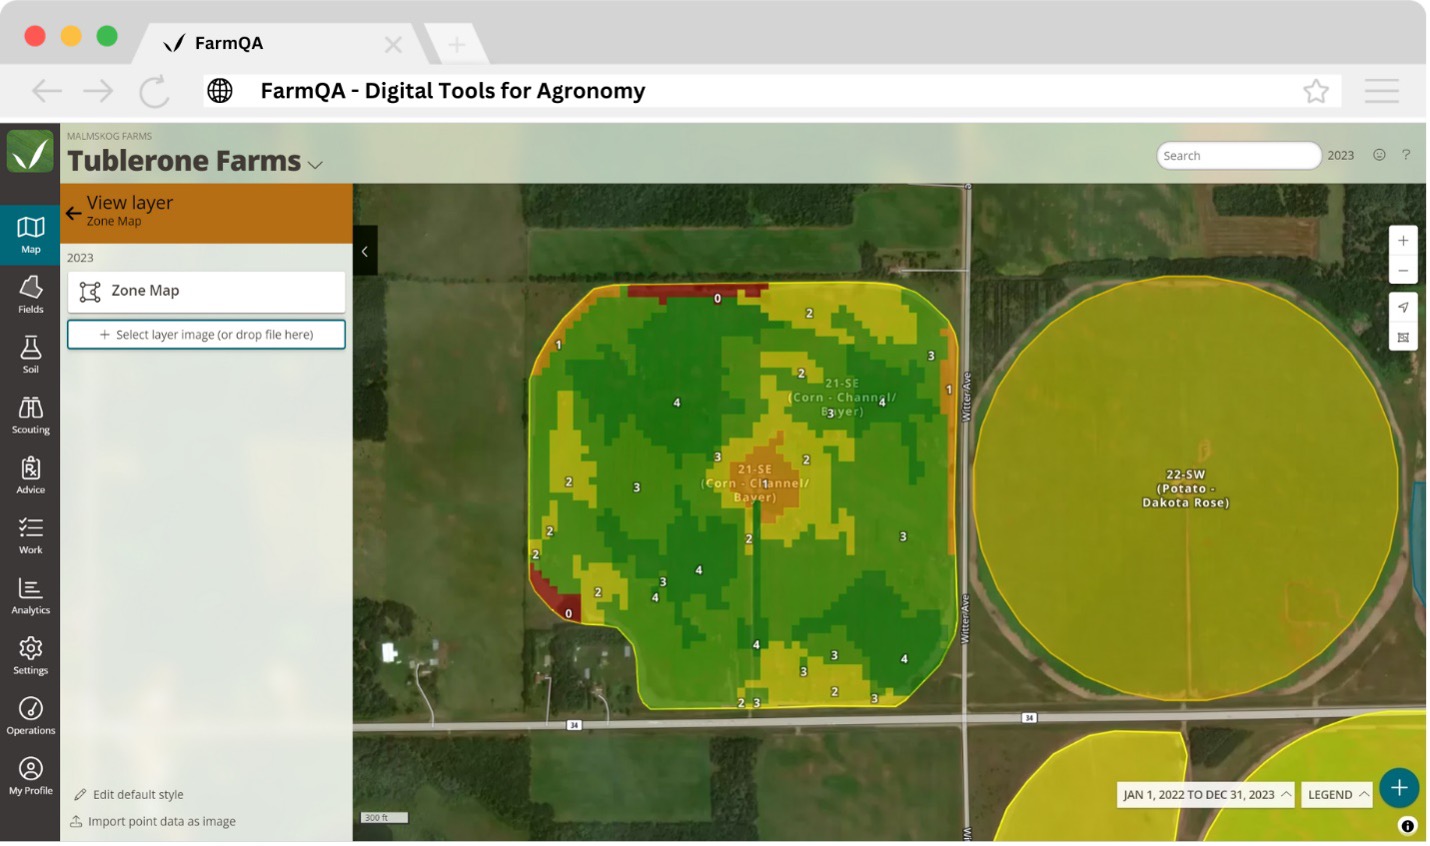
4. Upload any relevant map layers to your fields
Important spatial datasets like zone maps and soil series maps can be uploaded to your fields in FarmQA.
Article: Creating and setting up map layers
5. Get an Overview of Your Fields to Make a Sampling Plan
Your fields in the FarmQA mobile app can be colored by task so you can see which fields have soil sampling tasks assigned to them.
Article: Coloring fields in the FarmQA mobile app
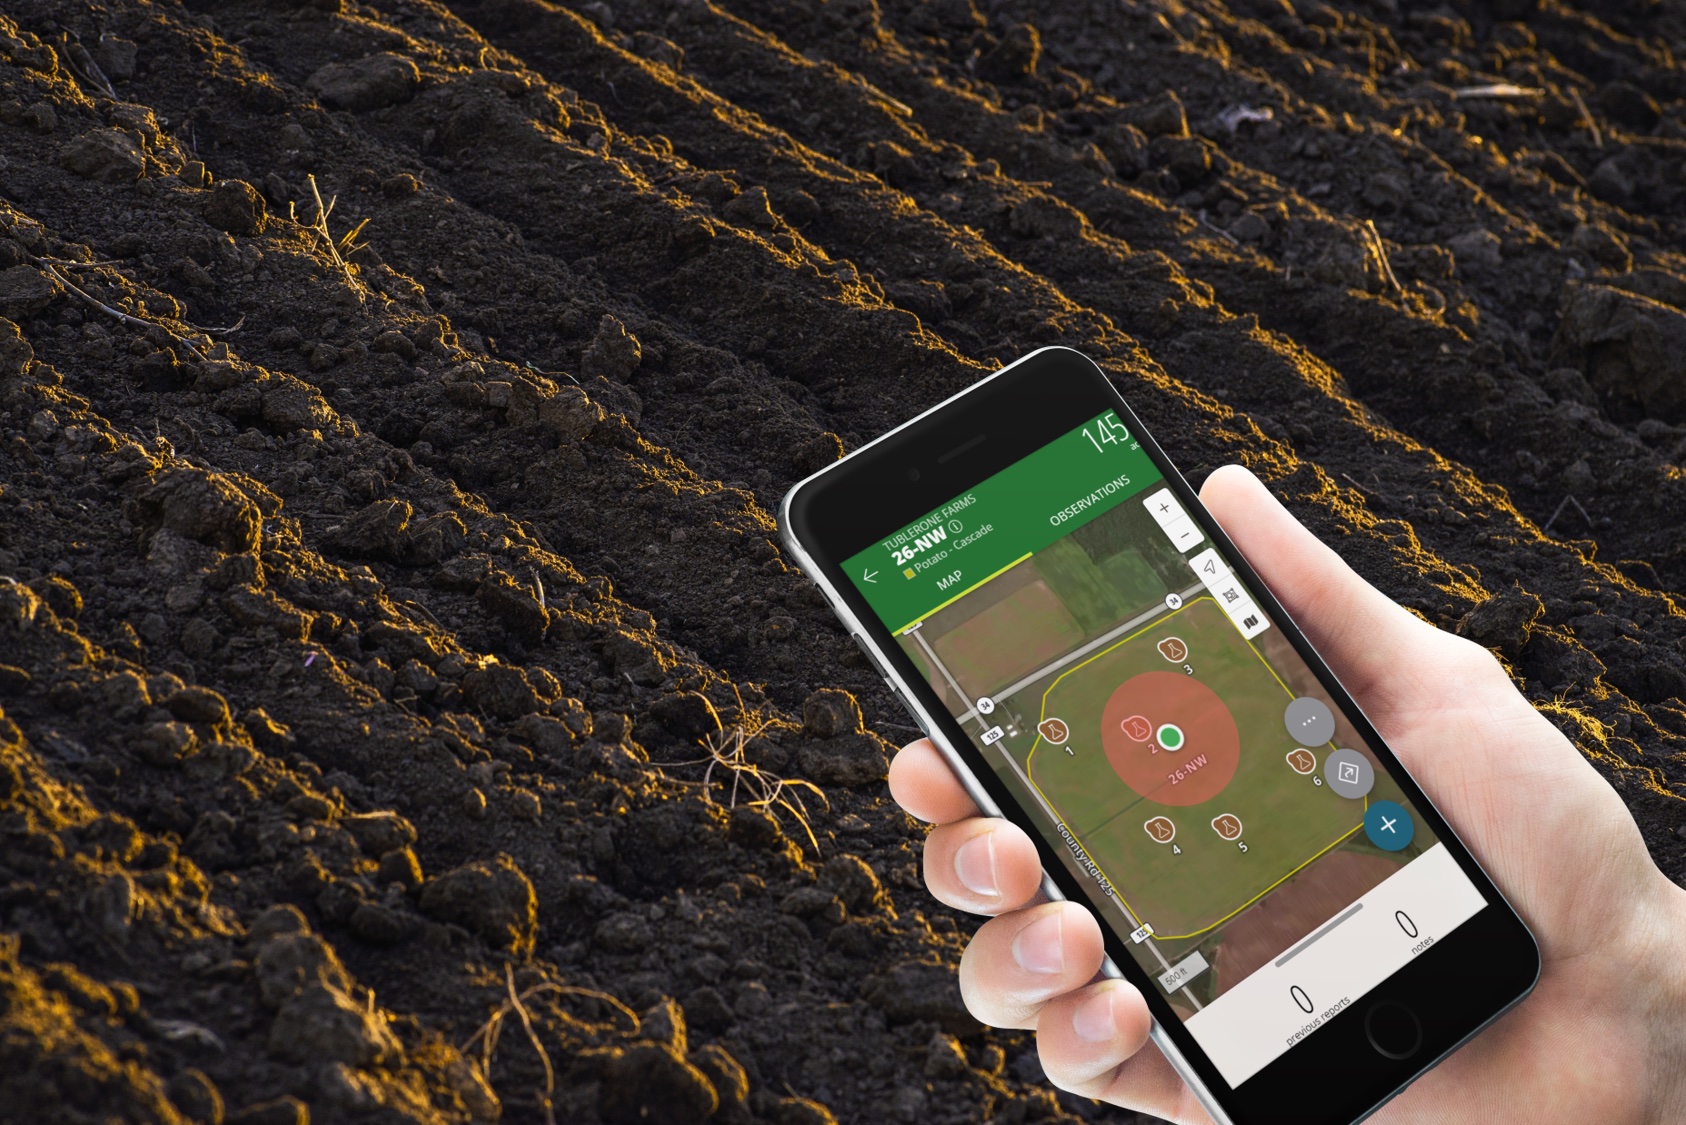
6. Navigate to the Field to Sample
It’s easy to get turned around when you’re out trying to find the field you need to sample. You don’t want to sample the wrong fields, and you certainly don’t want to get lost when you’ve got so many fields to sample. You can generate turn-by-turn navigations to the field you need to sample from the FarmQA mobile app. Directions can also be generated to a field entrance that you can setup from your FarmQA app.
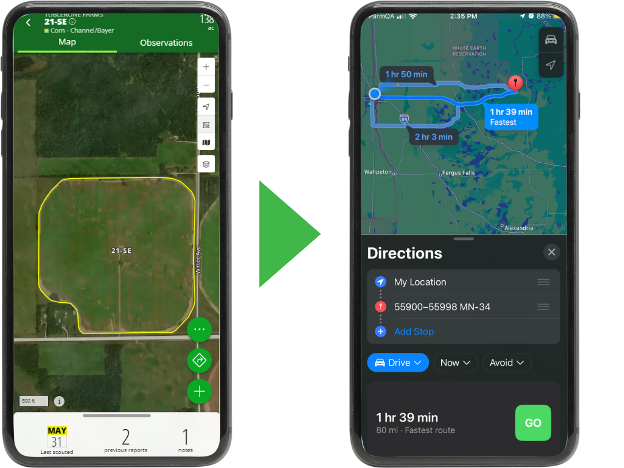
Article: Get turn-by-turn directions to a field in the FarmQA mobile app
7. Locate and Collect Your Soil Samples
Your distance to the nearest sampling location will be displayed while you are in Collect soil samples mode. Navigate to and click on your sampling location then use our built-in barcode scanner to easily bring in your soil sample barcodes and associate them with your sampling locations.
Article: Soil Sampling in FarmQA
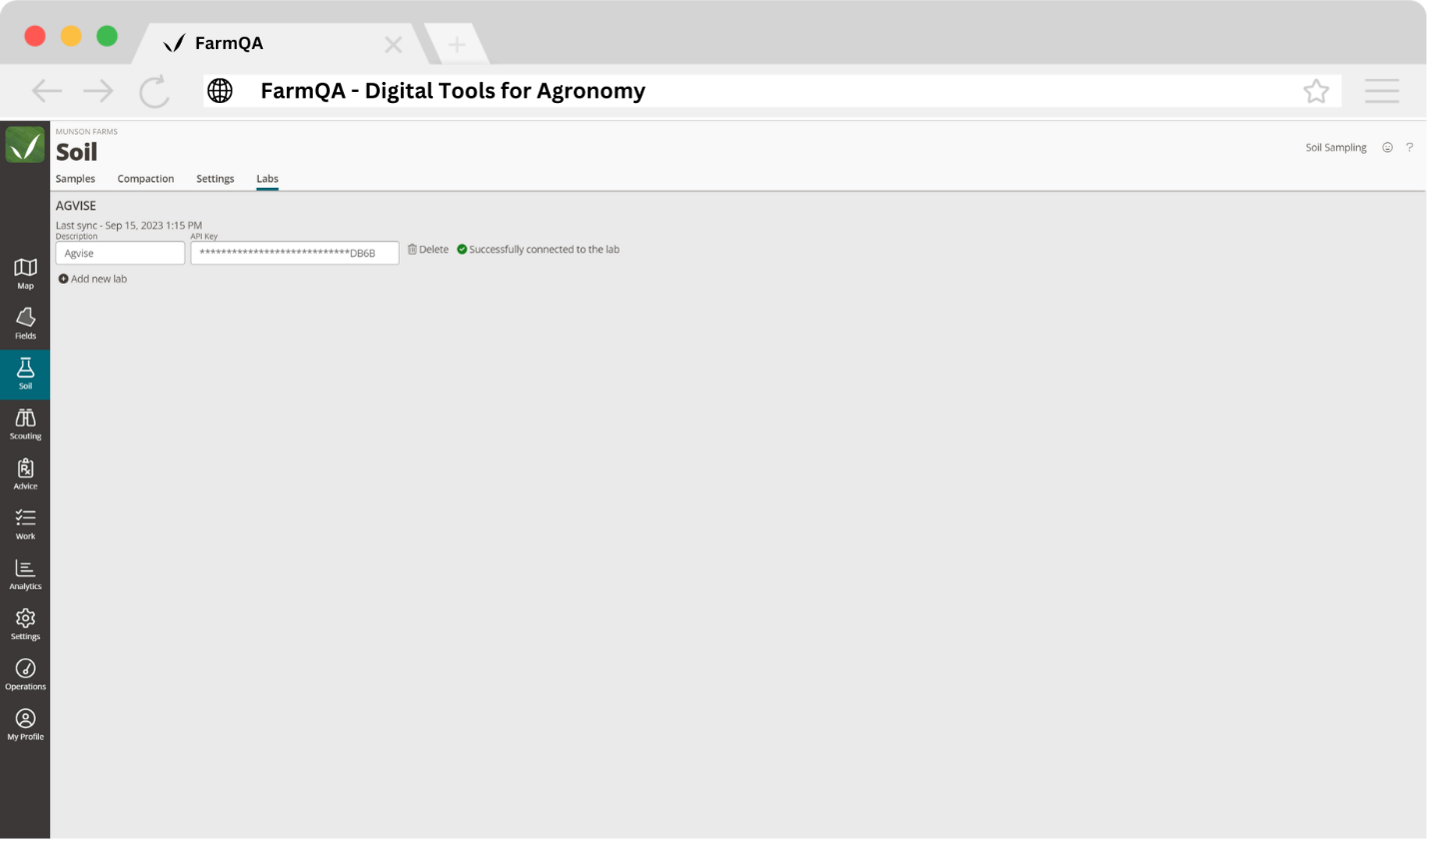
8. Set Up your AgVise Laboratories Integration
Copy the API key from your AgVise account into your FarmQA account and we’ll automatically import the soils data to your FarmQA account.
Article: Soil Sampling in FarmQA
8. Turn Your Sampling Locations into Markers
Consistently taking soil samples in the same location is important to better understanding the quantities and distribution of plant available nutrients in the field. Returning to past soil sampling locations is easy with FarmQA as sampling locations can be turned into markers with the push of a button.
Article: Soil Sampling in FarmQA
With FarmQA, managing soil sampling has never been more straightforward. By following these nine steps, you can efficiently collect valuable data to enhance your agricultural practices and optimize crop production. Soil sampling just got easier with FarmQA at your side.
Try FarmQA's soil sampling for 14-days Free